

Tips for great holiday shots: part two

Light is one of the most important factors in photography: understanding how to use it well will make a huge difference to your images.
Hopefully it will be bright and sunny wherever you’re going on holiday, so you’ll need to know how to avoid unflattering shadows on your subjects’ faces. Midday sun in particular doesn’t provide the best lighting situation. If you’re taking photos of people, you’re likely to get shadows under their eyebrows, chin and nose – it’s called panda eyes here in the UK or racoon eyes in The States. And it’s not a good look!
To avoid it use your camera’s flash, if you are within 1-3 metres of your subject. Yes – flash in bright sunlight. It might seem odd but trust me, it works! The picture will look so much better and your family or friends will thank you for it! Here are two images of my daughter – the first one without flash and the second with. Notice how the shadows have softened in the second example.


Here’s the science. Shadows are around four times darker than the rest of the face. While your flash can’t overpower the sunlight, it’s just about bright enough to lift the shadows giving a much more pleasing image.
Another option is to turn your subjects so they have their back to the sun so the whole of their face is in shadow. This will give a rather lovely “halo” of light around their hair and body, the technical term for this is “rim light”- often used by professional photographers and videographers! Here is another photo of my daughter “rim lit” with the sun behind her:

When you shoot into the sun be careful you don’t get flare from the sun on your lens. If you do, simply put your hand above and in front of your camera, just like the sun visor in your car. But make sure your hand doesn’t appear at the top of the photo.
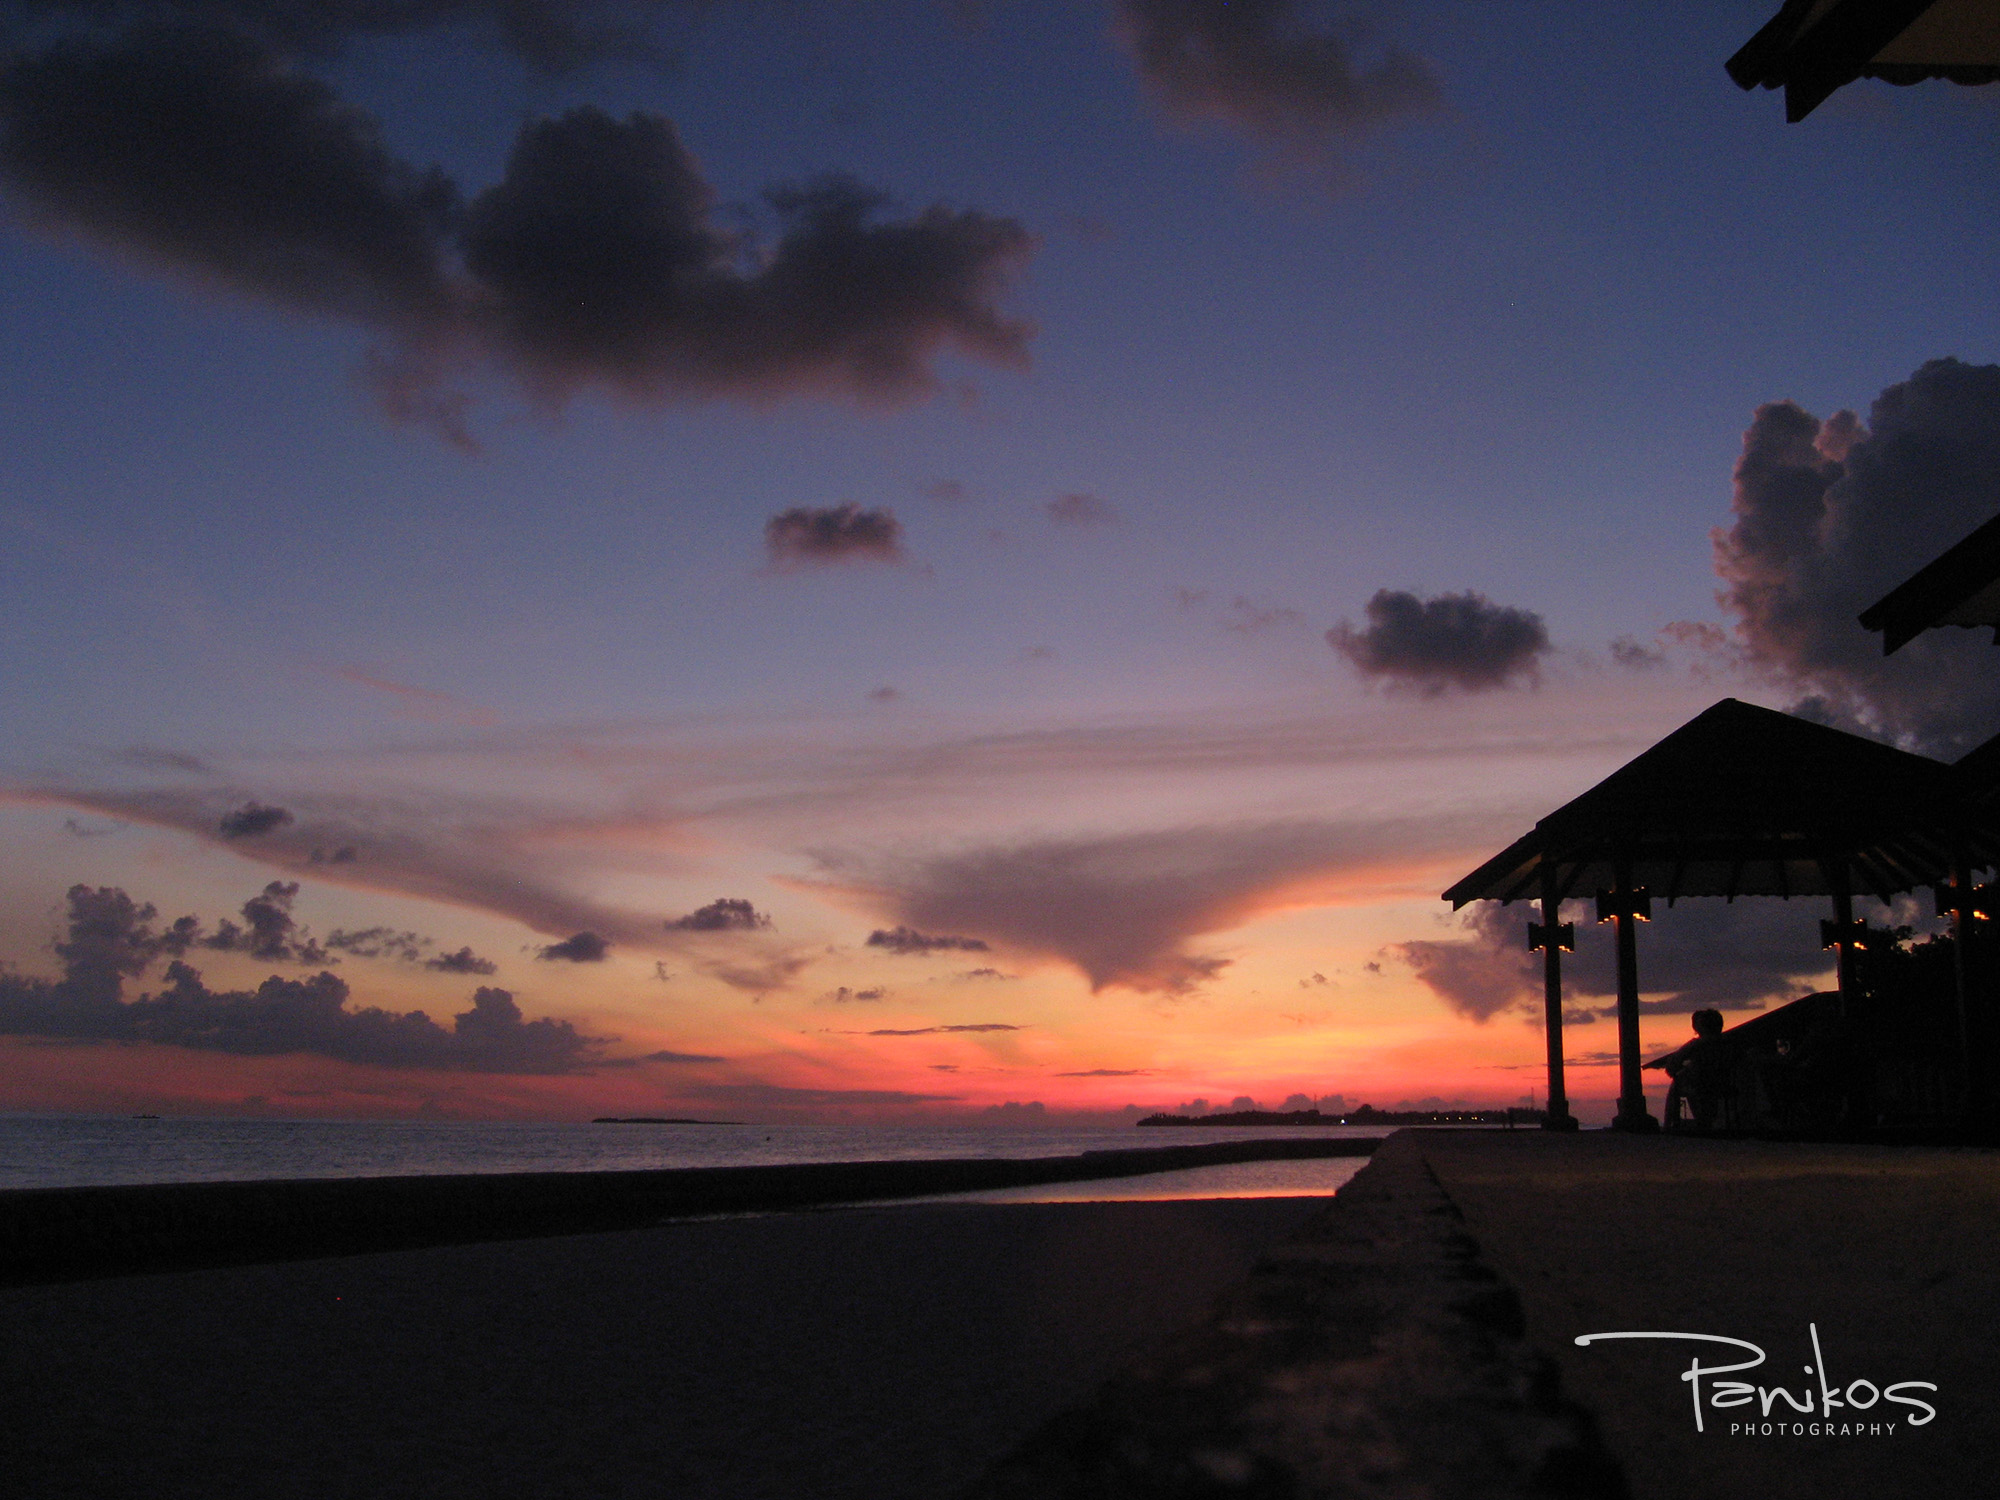
Discover Golden Hour
If you’re shooting scenery, whether in towns and villages, beach, sea or landscapes, remember the light is always better at dusk or dawn. It’s known as ‘Golden Hour’ which is preceded or followed by “Blue Hour” at dawn or dusk respectively. At either end of the day, the colours in the sky look fantastic, with wonderful rich hues and tones – particularly just after sunset.
Because the light levels are lower, there’s a risk you’ll get camera shake if you try to hand hold your camera. Use a tripod if you have one, but if you don’t, place your camera on something solid such as a wall or bench, or press up against the wall of a building to steady yourself. Turn the flash off and slowly squeeze the shutter while holding your breath. I took the sunset shot at the beginning of this post by placing the camera on a wall to make sure it was sharp and that the horizon was straight too.
Alternatively, you could use the self-timer so you don’t have to touch the shutter at all, which is how I took this shot, with the flash switched off.
Most hotels have lovely pool areas, which are usually lit at night. Use the same techniques to get some amazing, creative photos. I took the next photo of the pool, using the self-timer with the flash switched off.

Think about composition
If you’re photographing your family or friends on a beach, try to avoid plonking them in the middle of the photo and obscuring the beach and sea.
Firstly try to get the horizon line about a third of the way down from the top of the photo, and keep it level. Then place the people a third of the way in from the left or the right of the frame with their bodies facing the scene but their heads turned towards the camera. That way, you capture both your subjects and the beauty of the beachscape.
Photos that make a splash
In Part One, I talked about the advantage of underwater cameras.
They have custom settings just like bigger cameras, so if you’re going to actually use it under water do make sure you select the underwater setting. If you don’t your images will come out blue.
It’s also worth using these custom settings when taking night-time photos, shots of firework displays, landscapes, fast-moving subjects (sports mode) etc.
Cameras today are amazingly versatile with a vast array of features that allow you to be as creative as you want. So do make sure you pack your camera’s instruction manual to flip though when you’re flying to your destination?
If you’re taking pictures in clear water, such as in a swimming pool, you can use the flash if the subject is close, say around a metre or two away. However if there are particles in the water, such as dust or sand, you’ll get speckles all over the images because the flash will bounce off them.
Most of all, have a great holiday! I hope these tips will help you to create some wonderful memories.
